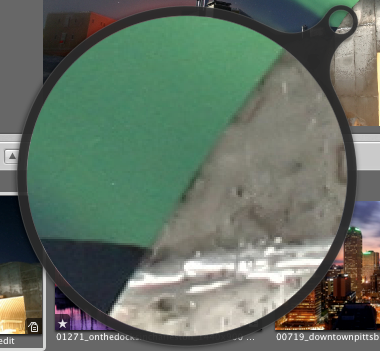
I haven't got all the time in the world to right tonights tutorial but I am going to give you an insight into one of the different tool included with Aperture. This tool of course is the Loupe tool. The Loupe tool is like a big magnifying class where you can zoom into an image with out actually zooming in. It offers a lot of detail as well as other features of an image for to use. If you want to match up a colour or change a specific colour more accurately this tool gives you an opportunity to do that.
The Loupe tool can be accessed from to different ways. Mostly from the View > Show Loope menu. The screen shot below shows me when I have got the Loupe open. I took this shot mid way through making this tutorial. So Hide Loupe would say Show Loupe. You can click any of the images to make them larger.

Another way to show the Loupe is to press the Show/Hide Loupe on the tool bar at the top of the screen. It may not be on your toolbar. Later on in this series I will show you how to customize the toolbar to suit your needs.

This is the basic loupe. The small circle in the top left (although it does move around on screen as you move the Loupe about) is the locator part of hte image. What is in the bigger circle is what is shown in the smaller circle.

One option that is useful at this point is that when you right click extra options appear at the bottom of the menu. I am going to go through this menu as well as the main menu from your menu bar in this tutorial.

The first option that is selected is the centered Loupe. A bit different as the small circle has disappeared and is one big magnifying glass. It does the same function, its just laid out differently.

If you right click on this menu you get some extra options.. You have options for Loupe magnification, pixel grid and values and weather the Loupe is centered like now or hidden.
The top option relate to the what is magnified. The "Focus on Loupe" means where ever the Loupe is, that is where magnification takes place. The "Focus on Cursor" means the magnification is where the cursor is at the present moment. Each have there pros and cons.

One of the options selected below is the Colour Value. It is given in RGBL format. Personally I don't no what the L stands for, could be luminance. This feature is good is you want to replicate the colour exactly.

One thing that you may need to do is make the Loupe bigger or smaller. This can be done through the right hand click menu or using the keyboard shortcut. The actual size of the Loupe changes on screen. You can also increase the magnification if you need to zoom in or zoom out more.

Pixel grid which can be accessed by right clicking on the Loupe after you have put colour values on draws, as you might expect, a grid on screen. This breaks down the pixels so you can easily see each one.

Now I no that this tutorial was a bit quick but you can get over it. I will be back either tomorrow or the day after for the next one. So sit tight. You can always visit the Apple Store if you need to purchase Aperture or any other product.