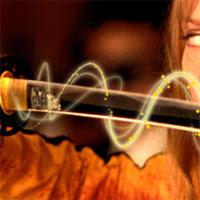
Energy beams are rather cool, and very popular for the sci-fi theme (or any theme) picture. This tutorial is going to show you a simple way to do these energy beams. The principle is very simple and can be used for nearly anything. For this tutorial I am going to use the Kill Bill image poster that I found here. I've changed it slightly to remove the text on the image. I love Kill Bill, and was great when it was re-ran on TV this Christmas. Click any of the images for the full versions.
Step 1) To begin, open up your image you can use the one below. It is a bit clear when the original text was but this image is only going to serve as a demonstration for this technique.
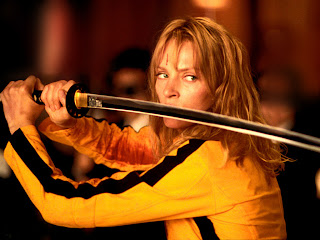
Step 2) Create a new layer above the image, this will serve as the energy beam layer.
Step 3) Select the pen tool (P) and in the toolbar at the top of the page select the 2nd option. This will enable you to draw the pen path and nothing else.
Step 4) Draw a wavy path around the sword. Imagine the path going around the sword, this will be tidied up later on.
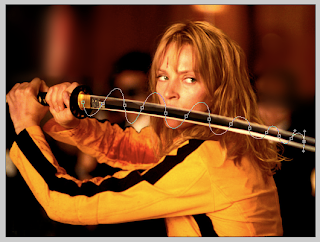
Step 5) Select the Brush (B) from the toolbox. Set the thickness to about 6px, add a little bit of blur (hardness) on the edges.
Step 6) Set the colour of the brush to #ffd400, this is the yellow used in the image.
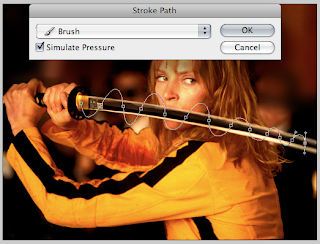
Step 7) Go to the Paths palette (Window > Paths) select work path. Right click on the path and select Stroke Path. Simulate brush pressure, this will make the path thin out at the ends.
Through out this tutorial you may need to hide and unhide the path. This is done by pressing the key combination Cmd/Ctrl + Shift + H. Sometime the path gets in the way and needs to be hidden.

Step 8) In the paths window drag the work path onto the new path button. This will change the state of the path to a new path shape. We need to work with the path a couple of times and we don't want it to disappear, this safe guards this.
Step 9) Use the Eraser (E) tool to remove some of the path that is behind the sword.
Step 10) Double click on the layer and set the outer glow. It really doesn't matter what you select, change the values so your image looks good.
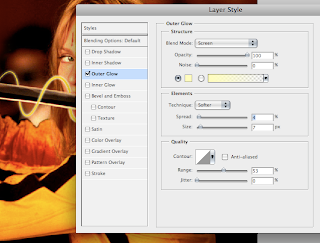
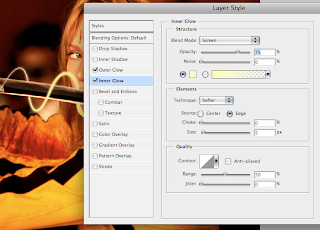
Step 11) Do the same with the inner glow.
Step 12) Create a new layer, stroke the path using the same settings, this will be used for a slight blur.
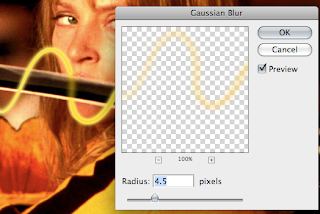
Step 13) Go to Filters > Blur > Gaussian Blur increase the value so the path is blurred. Reduce the opacity ever so slightly.
Step 14) Create a new layer once again. These are all on different layers so you can adjust the values if you need to later on.
Step 15) Select the Brush tool and select the advance brush options (Window > Brushes). Set the size to 4px. Spacing to 450%. In Shape Dynamics set size jitter to 100%. In Scattering set the Scatter to 1000%, Count and Counter Jitter to the Lowest possible.
Step 16) Stroke the path once again from the path palette. This will produce small dots around the edges. Repeat this step if you think there needs to be more small dots. If you want to find out more about particles check out this tutorial.
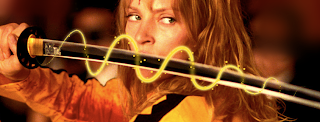
Step 17) Create a new layer and a new smaller path around the base of the sword. Reduce the brush size down to 3px, reset the brush so that it is normal and stroke this small path.
Step 18) Copy the layer effects for the first path onto the new smaller path. This is done by right clicking on the layer and selecting "Copy Layer Style". Right click on the new layer and select "Paste Layer Style".
Step 19) Repeat step 17 and 18 with different paths. Reduce the opacities on the layers to get the wispy effect.
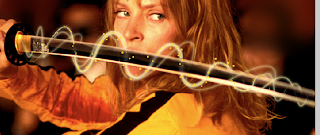
Option Step 20) If you find that the blurred layer looks to yellow, you can make it white by changing the layer properties. If you add a colour overlay of white, or off white you can adjust how it looks.
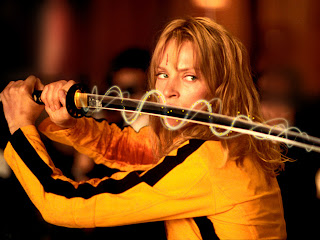
When you are done you can export the image (File > Save As). Its a pretty neat effect that can be used for nearly anything.
