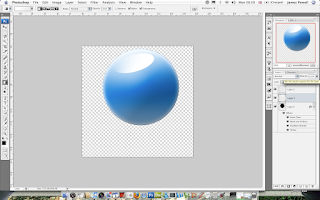
This is only going to be a quick tutorial on creating a cool looking orb. The orb doesn't serve much of a purpose other than looking cool. It could be used for parts of a website or interface. Click any of the images to see the full version.
For this tutorial you will need Photoshop or similar, and a Web 2.0 Layers and Gradients Pack. If you are ready then lets begin.
Step 1)
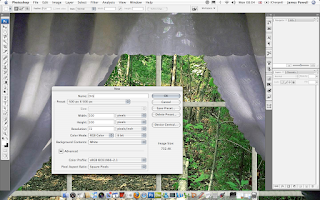
The first step is to get your canvas ready. Mine is size 500px x 500px. Position you canvas by a window for the best possible natural light.
![Creating an Orb - Photoshop](https://blogger.googleusercontent.com/img/b/R29vZ2xl/AVvXsEgtoY3OGPPXMczewcV2-9sr6uSJkHEhBGhOXLUHluwhlSgLUmvMEFrV_vRcJA0xLEIxe0zDDwNWeAHRZYT9rA_lI6I3G1g326TJxICyaDVsed4xQWo1T7hHLTdqd-JrzqXTnK70qcJCFVM/s320/Picture+1.png)
Step 2)
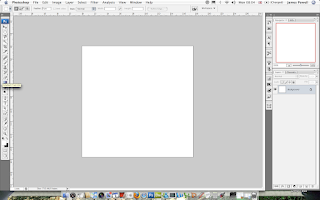
Now you have your canvas ready you need to begin drawing your orb shape.
![Creating an Orb - Photoshop](https://blogger.googleusercontent.com/img/b/R29vZ2xl/AVvXsEhPGEvkZLl1io1RksuFFSgPsbQhLQNy9q4crIrg6VBawz0vBRp5vT0TEA_stUPnzRz82j92bkgCBB9kJLWetqzFUyW3EhLvfDUCZJTMGVi2No0k-XXbEvdMBT9wU4l2oUl_wkXcoij2xwU/s320/Picture+2.png)
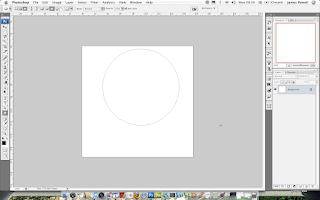
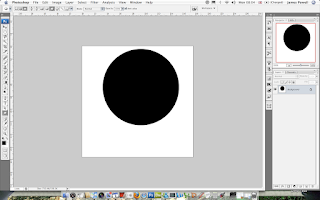
Use the circle shape tool to draw on the canvas, use the shift key to keep the ratio of the sides correct.
![Creating an Orb - Photoshop](https://blogger.googleusercontent.com/img/b/R29vZ2xl/AVvXsEiig00NZGWZQPIkPbuUWLSZN5WCW7z-8BFjf3-taGgz47G7_viw7tFkdDNTTUQNYJip2aR1k0YvwZ1qvPBTbEAfrZBK36ZCeMiDasIAQ55JYPTxfMlCaVv1e-QYChaDwHtd5xIxOmL-ekY/s320/Picture+3.png)
It really doesn't matter what colour the shape is as the effects will be applied later.
![Creating an Orb - Photoshop](https://blogger.googleusercontent.com/img/b/R29vZ2xl/AVvXsEjPvMeGb7Nr_p6TLEUFhhrfwOL33l_Snf5uAVpBSMI5VlxrZi-UAyv75mIRGUdTWbAdBBHw634EwnzSCJQAukSKj5krfuAGZPWpMRPPmewpK1uQ-0XFVtuPrZ63gH1KZTXQW6UQsm19bsI/s320/Picture+4.png)
Step 3)
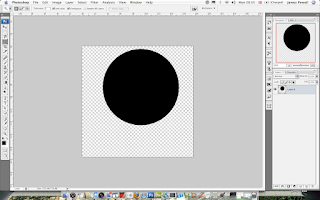
This is an optional step but you may need to remove the background. Click on the white with a magic wand and delete it.
![Creating an Orb - Photoshop](https://blogger.googleusercontent.com/img/b/R29vZ2xl/AVvXsEgTcdNj6f_ox4e_ph19o8cnLx-HmY9JVqZ_fEdI8PBfw3bWG5O5sBffjjkpPUFCXdF9bAak7h1c0q9dpF19FqZUWvbvXMa84hm1sic_U1Zy8RITCvvHzdUkzOyFf1vgfozSPm3WVVf4TVE/s320/Picture+5.png)
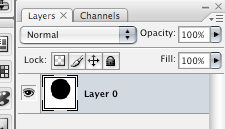
As well as this set the background layer to a new layer, this is vital for the effects to be applied.
![Creating an Orb - Photoshop](https://blogger.googleusercontent.com/img/b/R29vZ2xl/AVvXsEhA8WfCknLtmBgaCmAA1idFYzff1FSuvG5hmg-MRGcYdUcr1Xyd-jdUm5DqcMEPFhPgKcvDbJtFDjYxE5EqeegXyvzXnLAANMpprKcSAjWg-IADpzzUJU0yBwLzNCn9rM1auJlPrwNOHzI/s320/Picture+6.png)
Step 4)
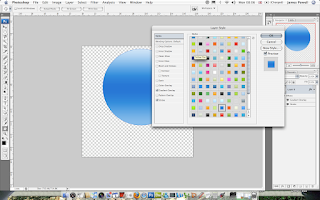
The next step is to add the layer effects. I suggest using the Web 2.0 pack. Pick a good gradient and style, although it doesn't matter to much.
![Creating an Orb - Photoshop](https://blogger.googleusercontent.com/img/b/R29vZ2xl/AVvXsEi-dByCwI7rZ-RG6ixjFTCw1MOFNDoJ0Np_7RKbaNpmlLdikgS4WhAxrUzf56zT_U69eqP8n_Dq9syOGsWBrz3OYm4WK__lSuSGjL1jrJQy3UwKcTsfLEwtdbJZQ2_bPVj82ur1paRoUi8/s320/Picture+7.png)
Step 5)
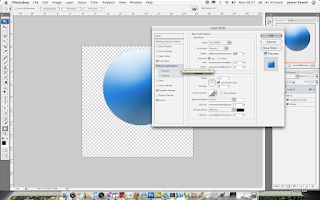
The next step is to apply a bevel. Put the size to maximum and reduce the opacity of the shadow. Play around with the settings.
![Creating an Orb - Photoshop](https://blogger.googleusercontent.com/img/b/R29vZ2xl/AVvXsEiKsQPDQSdh3C9oUcp13HBmV6aS85Qqkc96HjPwXrRCgzJO5DitVGyzHMUK6f04hM36fnzTkqbGNc8-5yb1E4qh5DYRb0Cx8LrjpGpBAydJPcM_OW346-0mj8Rh496N2qFA-Ihwxqe19tA/s320/Picture+8.png)
Step 6)
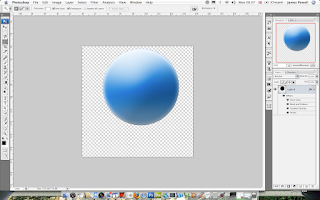
The next step is add an inner glow. Change the colour to white and size to around twenty.
![Creating an Orb - Photoshop](https://blogger.googleusercontent.com/img/b/R29vZ2xl/AVvXsEj2FYskFIhHhXIGQgfUYdpq_sGASv_9ttJdTKB3HQOxsSMQJJfmuYgWrnuDBfjs-L3riI7J5iSMYkQLHZaiMaTbUpCqKOmAq_1LgsXXExc82DkZ512n099GCF3bxc06fOCmQ2d01XE7Wx8/s320/Picture+9.png)
You have a good looking shape, we now need to refine the highlights.
![Creating an Orb - Photoshop](https://blogger.googleusercontent.com/img/b/R29vZ2xl/AVvXsEgY8lIhtf1ouNyfRY04oJjaFkTCjVRrTyqh4HwaEDKU-t7KHCb254r0tzbyn03fJzeW98aUzi-vmb3yTP6nIa5bY57Nczj-p2m81aVHxDLJzN70A9uMkmDb68pSRiElHkrQLTR3-GOlEKA/s320/Picture+10.png)
Step 7)
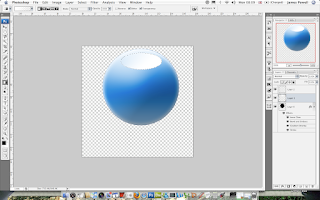
Create a new layer and add a white gradient to transparent in an oval shape.
![Creating an Orb - Photoshop](https://blogger.googleusercontent.com/img/b/R29vZ2xl/AVvXsEgc5ImRKDCLgTCWpSgc_ZYDJV01hUKDxv69a_dcw5Q9P1t5dOgt3vT-l5DU7uM6F60e0lAX84FYJ1Pr0gLc6Iesbq8D-XODCq4R-H50NUOT7D7AoYOWY2O9Ae49YXEqImj0GISAd7Wb0fQ/s320/Picture+13.png)
Step 8)
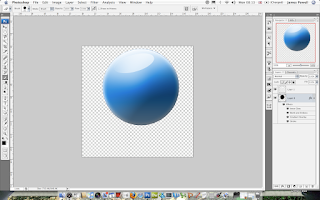
Rotate the layer
![Creating an Orb - Photoshop](https://blogger.googleusercontent.com/img/b/R29vZ2xl/AVvXsEg0OyO02kQRDTnpFeorEyQwnsjpd3vUF_vJo4udkQ-Iv4n5ae1X7QfB03pm6Y42-xtGx0NqQcBd7bAUv3rXmZs35n_AKsh_h5sxztRym_sKSqG23ueRzLIh0A_cd71VlPmsxyvYUr1xor4/s320/Picture+14.png)
Reduce the opacity so it blends into the colour more.
![Creating an Orb - Photoshop](https://blogger.googleusercontent.com/img/b/R29vZ2xl/AVvXsEiBzeGyGTHGmM8T6nVkAEEkF2O3S3devZhraJyBH0hLibq95hlVSFuvaZy4RokfRfxlVGThrhWWKU9dCf0KH9GpTxlvipm1DVgYjmVlpkB_M-FSFF6V1GgEUaea-2E0xq7UvWevWLgEuMI/s320/Picture+15.png)
You can at this point add a black shadow in the same. But it didn't work that well on mine.
Step 11)
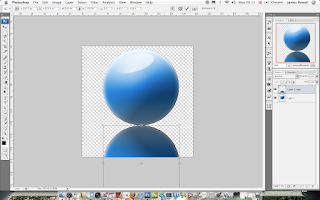
The next step is to copy the layer (after flattening) and flip vertically. Position underneath. This will be used for the transparent shadow.
![Creating an Orb - Photoshop](https://blogger.googleusercontent.com/img/b/R29vZ2xl/AVvXsEhCS4ZM8X5zAbxENlPHOq_cEzVsA7oKfan7cDPIrrIveMltpG2fGpK8eMjZmAyp12wwwCZdk2q1QFhs_rrLKGVvMXsQMXd1xA1pP3QlOgRcgAw1F29gRmaEpCe9CmxNamZVdbPZ2EcPEY8/s320/Picture+16.png)
Step 12)
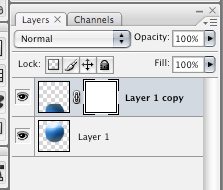
To create the shadow apply a layer mask. Set to reveal all.
![Creating an Orb - Photoshop](https://blogger.googleusercontent.com/img/b/R29vZ2xl/AVvXsEhIQ674Tn11ND0escjLC4YkfM5xdmc9HSbPpJadMKEx_pzg7kym34LQ0BcceEOo4QcYILBkme-5Vz871_J0QH3ovXX7046AIglCOK1ljE1zqmTnhC2fZh6-QBpuOGjTlUMeyyH3fewNzPA/s320/Picture+17.png)
Step 13)
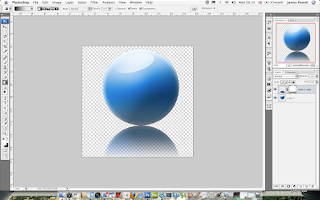
Using the black gradient on the layer mask you can remove parts of the shadow.
![Creating an Orb - Photoshop](https://blogger.googleusercontent.com/img/b/R29vZ2xl/AVvXsEilONBhOb4seq_mjOGYVC1XhVYUBhGJkFqrl-zPqlDwAP26VmoMUpPZEFEqj6pKxgQowpKt5p87NpOWlPGuLH1kvDvWNd398gfD3t05qr5HIre1AC-em0Eau5NAzPtmneAWhhn9-jv-KSs/s320/Picture+18.png)
Add a black background and flatten and you have a cool looking orb.
![Creating an Orb - Photoshop](https://blogger.googleusercontent.com/img/b/R29vZ2xl/AVvXsEiDaS7t7bvGCaMu6kxmunsFmMCyVe2AUzuTD0RNtdg6KyXBYc7KJ3Wspxucymy4mqM9lzb5aLSh0vK7cOksqn2f6O3w1kc-N_59UF2ZPgiFoQMYQijAZG8LgYB9gYYM_wa8E9hXCsSekl0/s320/Orb.jpg)
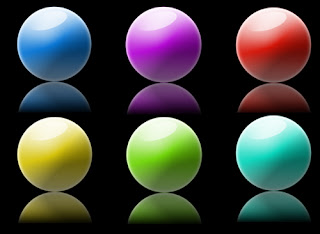
Using the hue saturation tool you can change the colour of the orb.
![Creating an Orb - Photoshop](https://blogger.googleusercontent.com/img/b/R29vZ2xl/AVvXsEh69uLq5Z0nAxH3Kr7AqFjV_y9aS-VVDdyIc-_ZP5ibxUxYvsJTnVujFffj-xP5RfMXOyoSlorHy9Ys3Yx2U2RdhEHwQ94Lt4PeMyMC9UAFpHrN7Ie1y6MHu8SbH13Aj3vmkXIDs6ntIJo/s320/orball.jpg)
Quite cool. Leave a comment to tell me what you think.