Showing posts with label Cool. Show all posts

Firebug Great For Web Design

Hey

There is one tool that I use the most for web design and that is Firebug. It is a simple firefox plugin that lets you dive into the CSS and HTML of a web page to see how it is built and works. It is great for understanding CSS and working out my stuff isn't working as it should be.

What firebug offers is a simple interface pane that appears on the bottom of the screen. You have on the left the html of the webpage, this is used in flippy triangle format so you can collapse great panes of html if you don't need it. On the right you have the CSS this is live, so you can change the CSS and see what happens.

It is a great tool to see how pages work, you can also fiddle about with pages to see why they aren't working as they should be. As well as this they also include script messages, as well as DOM and Net errors. A try developers tool. I recommend it to any designer new or old.

PicLens - An Amazing Firefox Plugin

Hey

I was really impressed when I cam across this plugin for Firefox. I was blown away with what it can do, as well as this amazing design on it. Its called Piclens and it is a plugin for most browsers that offers many cool features to show off images while searching the internet.

In a nutshell it is very similar to the image you see of the AppleTV, this has since changed but you get the general jist of what it is. You can browse through the hundreds of images within a Google search, or from some of the other popular images sites such as flickr. You can see by the image below the amount of images you can see, each is a real image that can take you to the respective website.


You get lots of swooshy effects as you zoom back and forth. You do need broadband other wise your computer will lag behind a bit with the rendering.


You can zoom in by double clicking on an image, this a flickr image (which I think is really cool) you get the full res. It is very Mac like and seems to work really well. Clicking on the the arrow in the top left will take you to the respective image if you want to view it in its context.


It is well worth checking out, have a play and tell me what you think. It will make searching through hundreds of Google images a lot easier. Go to PicLens for more information and links to download.

Amazing Blogger Design

Hey

I like blogger, it is simple, easy to use and very easy to implement designs. Anyway, I was really impressed by this blogger design. Its simple clean and has a couple of cool little features which make it stand out. Anyway if you head over to jackbook, you can check out the details about the "iWork" theme. I like it and I thought I would share.

Cool Place To Get Labels

Hey There

While searching the web as usually during a small period of free time I have, I came across a really neat website. Since this website is all about design I thought I would share something that could hopefully help your design skills and products. The website I am talking about is Frontier Label. This website has two great things that made me write a post about it. One the cool product, which are labels and two the website.

If you don't know the process you create your own artwork, upload it and then send it off to be turned into a label. I must say the prices are expensive, around $250. But these are about 2x3 inches minimum sizes. So you do get what you pay for, for your $250 you do get around 250-300 labels, so the price does work out. But you don't have to stick with your basic 2x3 inches. You can make a label that can be any size, this will of course be really cool to stick on places. You could make a funky design to advertise your services or just make people laugh. You could make the next viral image on the internet with your label on it. Better yet you could get your own bumper sticker for $658 for 1000 and do something like I Park Like An Idiot.com. The possibilities of labels are endless.

Another cool part of this site is the layout design. I usually like two things when I want to buy from a site. The products (duh!) and the site. I don't know why but this site just feels cool and well made. It has a lot of cool things such as online quoting which you can mess about with an really see how cheap (or how expensive) you can make it and I really like the colour scheme, it just seems to work well.

Anyway I just thought I would share it with you. These do seem like quality printers, which use quality stock. I don't think they will let you down. You could go for a cheaper place, but then you may not get the best quality and a quick next day delivery if you chose to opt for it.

Cool Website Feature - Lightbox - And Implemented

Hey

I always like cool little features that are present on websites. It makes them uniques or very cool when they are implemented correctly. One of theses such things is a bit of CSS and javascript that is used to create a "lightbox". You may have seen it on your internet travels. lightbox is a bit of code that opens an image on the page in its own little div elements. As well as this the background is blacked out to a certain level. I think it is really cool, so I decided to share it with you. An example of the lightbox is shown in the image below.


If you want to try it out you can go to the lightbox webpage and download the all the code. There is an earlier version that can be used but it doesn't look as cool. I have also added the code on this website and if you click on the image below you should be able to see the test in all its glory. It takes a couple of seconds for the image to load. If you do get impatient just click the loading icon and it should close the image overlay.


I am not going to be able to make every image lightbox compatible as I would have to go through every single page and image and change some of the code. But I will do it on most of the images I post from now on.

Just as a final note I would like to say kudos to GeckoandFly and some page.

Pingdom - Website Load Speed Tester

Hey

Its important for a web designer that a website loads quickly. Every remember the 4 second rule for websites? If a website doesn't load (or nearly all of it) then a user leaves. Most of the load time depends on a server but a lot of it can be sped up by finding out what time it takes for things to load. To enable you to do this quickly and effectively, this tool pingdom, is perfect.

What the tool does, is analyse the load times, from first connect to the last byte, of every element on your website. It the presents this in a a cool graphical manner for you to analyse and find out what is happening in terms of time.


This tool is really great. For example from the above graph I can see that one element of my site is taking a really long time to load. This can then be debugged and changed in my code. A better example of this was the reddit widget on my site. Before I found and used this tool, my site would take ages to load, over a couple of minutes. This code helped a lot.

I would definitely check this site out. Its is a really good tool to have in your design arsenal. Pingdom.

Go Media's Arsenal Of Amazing Vectors

Hey

I like to use Vectors a lot. They offer superb quality. You don't, like with many stock images, get rough lines or pixelated edges. As a result they can be scaled and used for virtually anything. This post today is going to be about a vector site which offers fantastic quality vectors for extremely cheap prices. Call Go Media's Aresnal they hold some of the best vectors around. I'm going to go through some of the packs today in this post, and show you what you can get. You will be amazed.

The Sets

Go Media has divided the vector arsenal they hold into 8 outstanding sets. Each set contains 7 or 8 smaller packs (these can be downloaded individually). The prices range from $15 for the individual sets and $50 for a complete set. You can pay over $350 for every single vector they own. There is a couple of thousand for every single one.

Whats In The Sets?

Each big set is split into small subsections which contain a vector file with all of the individual shapes and vectors contained on it. I will take set 6 as an example of what is included.

If you decided to buy vector pack 6 you get a downloaded zip file of 16mb. In this file there are 7 eps files. Eps files are a standard export of Vector files, they contain all of the information which can be used in Illustrator or any other vector program. Even Photoshop can handle them.

Each of the 7 files contain all of the individual vectors which you can copy and paste to your your work. Each of the 7 .eps files is on a different theme. You can buy each of these theme packs separately but you don't get the multi buy discount.

Contents

As I am focusing in on set 6 I will show you the specific contents of the vector set. All of the other sets are similar, they just contain different vectors. Set 6 contains:

Line Work

If you have every tried to make very detailed lines within Illustrator you may find that it becomes difficult. Problems usually arise trying to get all the lines perfectly lines up. Save your self some work.


Radial

Very similar once again to the lines these are fantastically detailed spirals and circles. They make great backgrounds.


Heraldry

Anyone wanting to do something medieval or wants to simply use dragons, lions, eagles, crowns, feathers, etc. This is an amazing pack that has a lot of detail. The only down side is they do lack in number. You only get 22 compared to the other packs which contain a lot more.

Destroy 2

As the packs are designed to follow on from previous installments this is the second type of pack with the in a similar nature. I would personally have named this grunge, as it is very grungy, dirty and distressed. Used best for overlaying on art work. They add cool texture. A very versatile pack.

Skylines

Ever need a skyline to set off that city background? This pack is probably what you need. Based on New York City, Cleveland, San Diego, Atlanta, Boston, Philadelphia, Houston, Dallas, Detroit, Chicago, Los Angeles, Minneapolis, and Miami (although I can tell the difference) they add a fantastic skyline feel to any piece of work.

Scribbles

Surprising difficult to make. The scribbles pack is just that, scribbles. The .eps packed with over 50 different scribbles can be used for nearly anything. Although they may not seem useful they can be used for nearly anything. They contain a nix of grunge and illustration you can find many uses for them.

Anatomy

Probably the most detailed of any set this set is all about the anatomy of a human. It contains vectors on spines, bones, hands, feet, heads. All sorts. If you need a piece of human to set of a piece of work. This vector pack is definitely the one you want.

How They Come

So you have download the vector pack and you have parted with your money but how to they come? Each and very one of the vectors will be on a vector file. You can then pick the one you want copy it to your clipboard and use it as you please. I will be doing a more detailed post on how to use vector packs in the future.


Want Some Free?

No site would be anything if you couldn't sample there offerings. If you want to download a sample vector file, similar to the one above head over to the Freebies section. They have a free vector pack which contains a small sample from every single pack. Really useful as you can see the level of detail they contain.

Conclusion

Go Media's Vector packs are definitely the best ones around. They offer a superb quality for a very cheap price. I would urge you drop buy and check out there products before even considering looking anywhere else.

VectorMagic. A Cool New Tool.

Hey

There is a really cool new tool out on the internet that can be used to help you vectorise any image. It produces really interesting and accurate results and is a lot better than the ones used by Illustrator. This new magical tool is called Vector Magic.

This online tool is designed to turn any inputted image into a vector image. Its very simple to use and the results can be retrieved off the server in under a couple of minutes. The engine works best with simple image with few colours. I've found that these result have come out the best. Photos which can also be upload, can be turned into vector but usually result in very jaggy edges between each of the paths.

There are only a couple of options to pick when uploading an image. Low, Medium and High. Low as the name suggests is done the quickest but produce the worst results. This isn't necessarily bad, if you want a quick starting point to work from. Medium and High do produce very accurate results. The high option usually results in hundreds of paths and shapes on your canvas. This can be useful if you want a very detailed image but is a pain if you want to edit your image afterwards.

Check it out see for yourself how it works. I'm sure you will be able to find a use for it. Vector Magic.

Prague Panoramas Pictures

Hey Peeps

On my recent trip to Prague I took many photos as you do. One of my favourite kind are Panoramas I love taking them and stitching them together in Photoshop. Below are the couple of Panoramas that I took. The first image contains 9 seperate shots and hasn't come out that well to be honest. Quiet a lot of data had to be removed since they were taken in a big curve. At one point there was more white that actual colour. I've 'shopped in a couple of trees and areas to make it look better. Thank fully the other 3 were taken with less shots and have come out a bit better.

Click the images for the full versions.


ShinyBinary - Check Out These Designs

Hey

I was searching the web, as a I do, and came across these guy. He's called Nik Ainley and is a UK based designer you can great some fantastic illustrations and art. It is superb what he can do and I am really amazed with the level of detail. Included below are some of my favourite picks. Although you can find the rest of his art work here.

Some might have bigger versions. Click to see them full size.

ShinyBinary
ShinyBinary
ShinyBinary
You can check his website out here.

Pixelmator Is Here.

Hey

Photoshop is a great program but it may have a competitor in the cheaper market. This new cool looking program is called Pixelmator and is availble for $59 and it could compete with the big daddy that is Photoshop.

Why is it so cool. It just seems for graphically oriented. For example it uses the GPU instead of the CPU to do the graphics rendering. This has its push and negative points but generally runs well on my Mac Book Pro, and is very is responsive.

Pixelmator If you case above it uses black a lot. Thats the drag and drop installation of the program. I fyou look below you get the welcome screen. It is normally a lot darker, but taking the image seems to have changed what the image looks like.

Pixelmator
Generally it looks good and is fun to use. You can see the darkness of all the palettes that the program has to offer. It is quick and simple to use but like any new programs it is new so there are some bugs.

Pixelmator The above image didn't take me long to do. Although it is a bit rubbish it is fun to work with so I might give it a try. You can find it here on Pixelmators website.

Wallpaper Wednesday - Heavy Load

Hey

This is a really cool and different wallpaper which you can use as your background. Don't you just love it when the perspective of things come together.

Click for full size.
Must be a heavy load.

Wallpaper Wednesday - Retro Shells

Hey

Its Wednesday again, doesn't time fly? This weeks wallpaper is quite a wired one. It involves a composite of shapes and brushes on a cool red background. Click the image for the full version.

Retro Shells

Cool Favicons

Hey

You see favicons all over the web. These are the small 16 x 16 pixel images that appear in you browser address bar or your tabs. But which are the coolest on the internet.
I think these are some of the best.

Candy Stand, The Black bits don't appear on the final make up. Simple yet effective.

ClickBank, A very stylish favicon.


Digg, Appears through out there site. Simple design.


ExtraLife, One of my favourite Cartoons, the favicon is a relation to this.


Radiotimes, This icon glares out at you, simply showing the cut down version of the sites logo.

Reddit, Again using the logo for the favicon, this scales well and it instantly recognizable.

Tv Links, Again simplicity at its best another great piece of design.

World of Warcraft Guides, So much detail in such as small space. Another good icon.

Website Friday - Tube Photos

Hey

Its website Friday. This is a really cool website with some amazing images of the London Underground. Some of the pictures are so outstanding. You can find the website here.

Tube PhotosAnother cool website on the internet. There great.

Wallpaper Wednesday - Radioactive.

Hey

Its time for Wallpaper Wednesday. This weeks picture is of a cool radioactive sign. The depth of colours for the yellows and browns, I think are amazing.
Click the image for the full size. Dimensions are 1440 x 900 pixels.

Creating an Orb - Photoshop

Hey

This is only going to be a quick tutorial on creating a cool looking orb. The orb doesn't serve much of a purpose other than looking cool. It could be used for parts of a website or interface. Click any of the images to see the full version.
For this tutorial you will need Photoshop or similar, and a Web 2.0 Layers and Gradients Pack. If you are ready then lets begin.

Step 1)

The first step is to get your canvas ready. Mine is size 500px x 500px. Position you canvas by a window for the best possible natural light.

Creating an Orb - Photoshop
Step 2)

Now you have your canvas ready you need to begin drawing your orb shape.

Creating an Orb - Photoshop
Use the circle shape tool to draw on the canvas, use the shift key to keep the ratio of the sides correct.

Creating an Orb - Photoshop
It really doesn't matter what colour the shape is as the effects will be applied later.

Creating an Orb - Photoshop
Step 3)

This is an optional step but you may need to remove the background. Click on the white with a magic wand and delete it.

Creating an Orb - Photoshop
As well as this set the background layer to a new layer, this is vital for the effects to be applied.

Creating an Orb - Photoshop
Step 4)

The next step is to add the layer effects. I suggest using the Web 2.0 pack. Pick a good gradient and style, although it doesn't matter to much.

Creating an Orb - Photoshop
Step 5)

The next step is to apply a bevel. Put the size to maximum and reduce the opacity of the shadow. Play around with the settings.

Creating an Orb - Photoshop
Step 6)

The next step is add an inner glow. Change the colour to white and size to around twenty.

Creating an Orb - Photoshop
You have a good looking shape, we now need to refine the highlights.

Creating an Orb - Photoshop
Step 7)

Create a new layer and add a white gradient to transparent in an oval shape.

Creating an Orb - Photoshop
Step 8)

Rotate the layer

Creating an Orb - PhotoshopStep 9)

Reduce the opacity so it blends into the colour more.


Creating an Orb - Photoshop
You can at this point add a black shadow in the same. But it didn't work that well on mine.

Step 11)

The next step is to copy the layer (after flattening) and flip vertically. Position underneath. This will be used for the transparent shadow.

Creating an Orb - Photoshop
Step 12)

To create the shadow apply a layer mask. Set to reveal all.

Creating an Orb - Photoshop
Step 13)

Using the black gradient on the layer mask you can remove parts of the shadow.

Creating an Orb - Photoshop
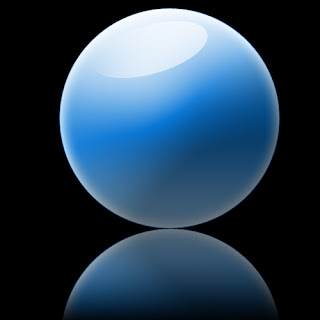
Add a black background and flatten and you have a cool looking orb.

Creating an Orb - Photoshop
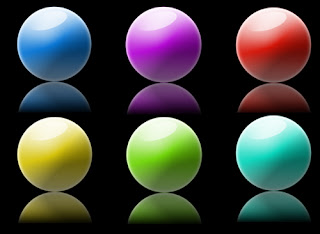
Using the hue saturation tool you can change the colour of the orb.

Creating an Orb - Photoshop
Quite cool. Leave a comment to tell me what you think.