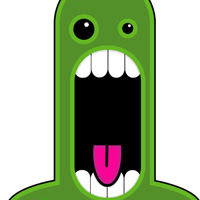
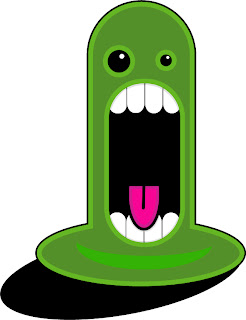
 Over that last couple of days i've been playing around in Illustrator a lot make some basic shapes and images. One of my best creations is the Blob Monster called the scream. It is really simple to do and doesn't take long to complete. This technique can be used for nearly any type of simple shape / monster. If you are ready lets begin. You can click any of the image for there full versions.
For this tutorial you will need:
Illustrator,
About 20 minutes.
Step 1) The first step in creating our blob monster is to create the body. Use the rounded rectangle tool to create a rectangle on the page. Use the arrow keys to change the amount of rounding being applied to the corners. Set the fill to nothing or white and the stroke to black. Have a stroke setting of around 2-3 pixels.

Step 2) The next step is to create the sucker bit at the bottom. Draw an ellipse and position appropriately. Try to centre it as much as possible. We are then going to use the pathfinder tool ( Window > Pathfinder) to change the paths of the shape. Use the add shape area, and then click expand. This will remove the paths that are crossing and then join them together to make one path. The pathfinder is a really powerful tool and we will be using it a lot in this tutorial.

Step 3) Use the ellipse tool again. Hold shift and draw to circles. Make them different sizes to make the mad appearance. Fill them black.

Step 4) Use the rounded rectangle tool and draw a suitable shape to be used as the mouth. Set the stroke to black and the fill to white or nothing.
 Step 5) We now have the basic elements on the page. The next step is to fill the background colour of the blob in. Pick a green colour and set the fill of the shape to this colour.
Step 6) We now need to apply some highlights. Copy the blob monsters layer shape. Set the fill to nothing and the stroke to a lighter green. In the stroke menu options (which can be accessed with the little arrow on the pallet) set the path to inside. Increase the stroke size.
The next step is to align the paths. Move (black arrow, v) the new path close to the main layer. Use the align (Window > Align) to align these paths. Use both of the horizontal and vertical alignments.
You way want to change the thickness of the black path and align these to the outside.

Step 7) Repeat this process of copying the layer, changing the stroke settings and alignment for all the objects we have.

Step 9) We now need to add some teeth. Use the rounded rectangle tool again to draw some teeth at the top of the mouth. You want about 4. Use Cmd/Ctrl plus the square brackets to move the draw shape up and down the layer list. You want them behind the highlight layer.
Select all of the top teeth, copy and paste them onto the canvas. Right click them them still selected select Transform > Reflect and select Horizontal when prompted. Press ok and manually align them behind the mouth.
The next step is to erase the bits of the tooth we do not want. Use the eraser tool (Shift + E) and use the square brackets keys to change the size of the brush head. Lock in the layers pallet (Window > Layers) you do not want to change. Press the little space by the eye to lock the layer. This will prevent editing.

Step 10) Create another ellipse and use the square and pathfinder tool to get the top off the ellipse. Set the colour to pink, and the stroke to quite thick.

Step 11) Copy the tongue layer, and as previously, add an inside stroke and change the colour. Align to the mouth.

Step 12) We now need to make to visible that the blob is sticking up. Draw an ellipse again, and change its colour to the colour used to add a lighter edge (i've not done it in the photo).
 Step 13) Add another ellipse which is larger and use the path finder tool to cut these part away.
Step 14) We are about half way done. Admire your work.

Step 15) Use the ellipse tool once again, have the fill to black and draw and ellipse to create a shadow. Use the Cmd/Ctrl + Shift + [ to set the layer right to the bottom.

Step 16) Add small white filled circles to highlight the eyes.

Step 17) This step is a bit tricky so I have left it till the end (I also forgot to do it, shhh) Use the pen tool and draw a line around on the edge of the high light around the tooth. Set the colour to a light grey. Enable rounded edges.

Step 18) Go Object > Path > Outline Stroke to set the path to an outline.

Step 19) Use the eraser tool (Shift + E) to remove the edges of the fill. Use Cmd/Ctrl + [ to layer the fill so it is above the tooth but below the highlight layer.

Step 20) Complete this so it is around all of the teeth and the tongue. It is only subtle but adds a final detail to show off the blob monster.

Looks cool. Click for full size.

