Showing posts with label Aperture. Show all posts

Aperture Tutotial - Cropping Photos - Part 13

Hey

Cropping photos is easy in Aperture. Like most things it only involves a couple of clicks and doesn't take long to do. The first thing you need to do is open Aperture and find a photo you need to crop.

Aperture Tutotial - Cropping Photos
The next step is to select the crop tool. This is located in the tool bar.

Aperture Tutotial - Cropping Photos
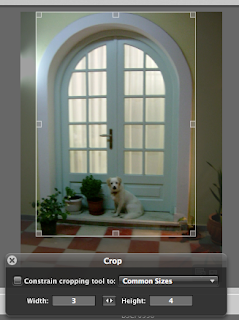
Drag a box around the part of the image you want to crop. The lighter sections will be kept. The darker sections will be removed.

Aperture Tutotial - Cropping Photos
The floatable HUD does have built in options for preset sizes. For example if you look at the image below these are all the sizes you can use. The select box changes to which ever size you select.

Aperture Tutotial - Cropping Photos
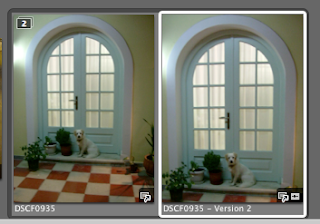
Pressing enter or selecting another tool crops the image and create a new image in the stack.

Aperture Tutotial - Cropping Photos
This tool is easy to use and you can crop all your image in no time. You can read the rest of the series here.

Aperture Tutorial - Rotating Images - Part 12

Rotating images in Aperture is as simple as two clicks. Ill show you the simple steps needed so you can do it every time.

The first step is to find the rotate button. Its located in the toolbar at the top of your screen. Click either of the two on the right. You can also press on of the square brackets ( [ & ] ).

Aperture Tutorial - Rotating Images
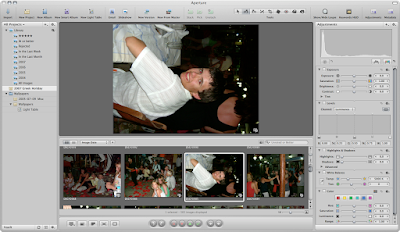
Notice the images in there slanty uncorrected position.


And after a click or 3 the image are the right way round. You don't have to change the tool to change the rotation of the image just keep clicking and the image will keep rotating.

Aperture Tutorial - Rotating Images
Thats was a quick tutorial. There will be another one tommorow. You can read the rest of this series here.

Aperture Tutorial - Straightening Images - Part 11

Hey

This Aperture tutorial is all about straightening photographs. It is pretty simple to do and doesn't take long to do each photograph. Please bare in mind though you do need a fast-ish computer if you want to do these quickly as it take a couple of seconds for me for the image to initially update. This was quiet funny as many of the image were even worse than before. If I had hundreds of these to do I might use a Mac Pro to easily cut through the photos, my Mac Book Pro struggled a little till I got the hang of waiting. I could of course just take the photos straight to begin with.

Anyway rotating photos could not be easier in Aperture, all it involves is finding a dogey photo, clicking the straighting icon, move the mouse up and down and watch it as the photo rotates. I will show you through the steps.

Aperture Tutorial - Straightening Images
Once you find your photo you want to correct click the Straighten Tool (G) wait a couple of seconds (if necessary for the tool to load)

Aperture Tutorial - Straightening Images
You will notice that a grid comes up on your image, click and drag your mouse forward and backwards to line up the image. Aperture automatically rotates and crops your image for you.

Aperture Tutorial - Straightening Images
When you done let go. As with anything in Aperture a Stack is created. You are done and ready to move onto the next image.

Aperture Tutorial - Straightening Images
Thats all for this quick tip in Aperture. You can see the rest of the series here.

Aperture Tutorial - Red Eye - Part 10

Hey

Its part 10 of the Aperture series with no foreseeable end, todays tutorial is only going to be quick since I haven't got a lot of time to spare. I am going to use the simple red eye tool to quickly remove red eye from photos. It doesn't take long to learn and is only point and click to use. So if you are ready strap yourself in and lets get ready to roll.

The first step is to find an image which is a suitable offender to remove the red eye. If you look below you can find an image of me (don't I look young) which has red eye.

Aperture Tutorial - Red Eye
The next step is to select the red eye tool. This is located on the toolbar at the top if you have the default layout used.

Aperture Tutorial - Red Eye
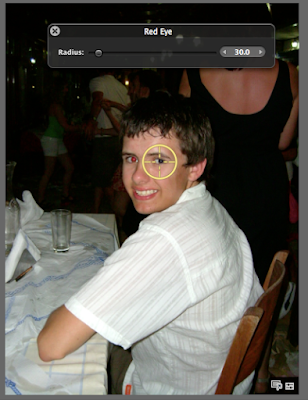
What pops up is this floating HUD (Heads Up Display). Its pretty simple to understand. The slider and value is indicating the size of the circle / "brush" which is used to remove the red eye. you want to get the circle small but is doesn't have to be precise, just some where in the region of the size of your eye,

Aperture Tutorial - Red Eye
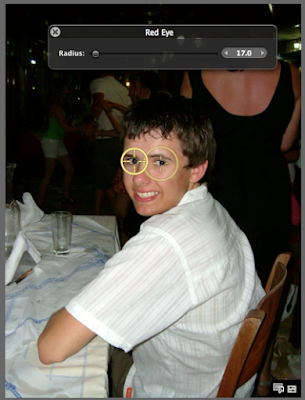
What you then need to do is click on the red eye. The circle will then change to this cross hair style pointer on your eye.

Aperture Tutorial - Red Eye
Do the same with the other eyes on your image and the red eye is gone. No messing point and click.

Aperture Tutorial - Red Eye
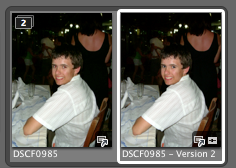
As with everything in Aperture a new image has been created and put into a stack. You can read one of the previous tutorial about stacks.

Aperture Tutorial - Red Eye
Well this tutorial was short but there isn't really much to explain. You can read the rest of this series here. Aperture is available from the Apple Store at a great price. You can purchase your copy here.

Aperture Tutorial - Loupe - Part 9

Hey

I haven't got all the time in the world to right tonights tutorial but I am going to give you an insight into one of the different tool included with Aperture. This tool of course is the Loupe tool. The Loupe tool is like a big magnifying class where you can zoom into an image with out actually zooming in. It offers a lot of detail as well as other features of an image for to use. If you want to match up a colour or change a specific colour more accurately this tool gives you an opportunity to do that.

The Loupe tool can be accessed from to different ways. Mostly from the View > Show Loope menu. The screen shot below shows me when I have got the Loupe open. I took this shot mid way through making this tutorial. So Hide Loupe would say Show Loupe. You can click any of the images to make them larger.


Another way to show the Loupe is to press the Show/Hide Loupe on the tool bar at the top of the screen. It may not be on your toolbar. Later on in this series I will show you how to customize the toolbar to suit your needs.

Aperture Tutorial - Loupe
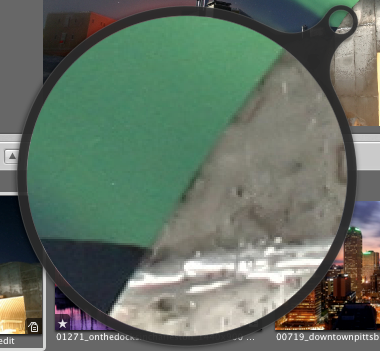
This is the basic loupe. The small circle in the top left (although it does move around on screen as you move the Loupe about) is the locator part of hte image. What is in the bigger circle is what is shown in the smaller circle.

Aperture Tutorial - Loupe
One option that is useful at this point is that when you right click extra options appear at the bottom of the menu. I am going to go through this menu as well as the main menu from your menu bar in this tutorial.

Aperture Tutorial - Loupe
The first option that is selected is the centered Loupe. A bit different as the small circle has disappeared and is one big magnifying glass. It does the same function, its just laid out differently.

Aperture Tutorial - Loupe
If you right click on this menu you get some extra options.. You have options for Loupe magnification, pixel grid and values and weather the Loupe is centered like now or hidden.
The top option relate to the what is magnified. The "Focus on Loupe" means where ever the Loupe is, that is where magnification takes place. The "Focus on Cursor" means the magnification is where the cursor is at the present moment. Each have there pros and cons.

Aperture Tutorial - Loupe
One of the options selected below is the Colour Value. It is given in RGBL format. Personally I don't no what the L stands for, could be luminance. This feature is good is you want to replicate the colour exactly.

Aperture Tutorial - Loupe
One thing that you may need to do is make the Loupe bigger or smaller. This can be done through the right hand click menu or using the keyboard shortcut. The actual size of the Loupe changes on screen. You can also increase the magnification if you need to zoom in or zoom out more.

Aperture Tutorial - Loupe
Pixel grid which can be accessed by right clicking on the Loupe after you have put colour values on draws, as you might expect, a grid on screen. This breaks down the pixels so you can easily see each one.

Aperture Tutorial - Loupe
Now I no that this tutorial was a bit quick but you can get over it. I will be back either tomorrow or the day after for the next one. So sit tight. You can always visit the Apple Store if you need to purchase Aperture or any other product.

Aperture Tutorial - Stacks - Part 8

This was sort of explained in the previous tutorial about the use of stacks within Aperture. Stacks are very important as they control the way you work with photos in the Aperture program. For example every time you modify a photo a new image is made. If there was no way to organise these photos you would have hundreds of the same photo except with minor alterations with each one. There would be to many photos, it would become to cluttered and you would find it hard to work. The use of a stack reduces the amount of photos that are in the file browser. They are still there only hidden. This reduces the amount on screen improving work flow. As well as individual photos you can put similar (or not very similar) files into stack of there own. This can be used for files that you don't like or for shots that you took in rapid succession and do not need to be separated. Of course you can break up stacks and have stacks within stacks. Although stacks within stacks are broken up.

If you are ready I will give you a guided tour of the features and interfaces that you see and use to be able to use stacks within Aperture. Click any of the image for there full versions. If you are new and haven't yet got your copy of the program. Visit the Apple Store for more information.

OK, the main menu for stacks which I would be referring to through out this tutorial is on the menu bar. Clicking on this menu will get you all the different menu options of the stacks. I will be referring to options from within here. So if you can't find what i'm talking about here is a good place to look.

Aperture Tutorial - Stacks
If you notice the following image is in a stack. It was used in the last tutorial. Stacks are defined by the number badge in the top left hand corner. This number increase as more images are added to the stack.

Aperture Tutorial - Stacks
The stacks menu. Located in the menu bar at the top of the screen this offers all of the option or creating and modifying stacks. There are shortcuts so you can use them to quickly achieve what you want.

Aperture Tutorial - Stacks
If you open a stack, all the images are displayed. They are encompassed by a small blackish boarder, so you can still figure out that they are still in a stack. The number in the top left is still present.

Aperture Tutorial - Stacks
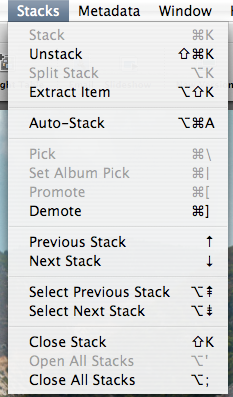
The top half of the Stacks menu is about creating and breaking stacks, if you look at the photo below you will see what I mean.. By selecting photos and using the Stack option, these photos are then placed into a stack.
The unstack option removes the photos from the stack. It doesn't open and close stack as I originally thought when I first used this program. It may take a while to realize what this does.
Split stack is a bit like taking a knife to the stack. If you click on a, say the third photo like in the photo above the first and second become a separate stack and so do the third and last.
Extract removes the single (or more than one if selected) out from the stack.

A quick tip, if you drag and drop a photo into the stack it is the same as adding. Dragging the photo out also works. A small green vertical arrow will appear if the photo is out of the stack.
Aperture Tutorial - Stacks
Moving down there is the auto stack option. This I find is a bit hit and miss. It automatically sets its own stacks depending on the photos you use. and the parameters you set.

Aperture Tutorial - Stacks
When in stacks the image you create may be more important that the one that is currently shown at the front of the stack. Using the pick button promotes the image to the top. This is the main image shown when you close a stack. The album pick is similar but for albums.

Promote and Demote move images up and down a stack. For example if you have made lots of modifications to an image and have lots of photos in a stack you can use the promote demote options to move and image up and down. A rank of you image if you will. If you promote and image all the way to number one it is the same as pressing pick.

Aperture Tutorial - Stacks
This next screen shot of the menu are the navigation options. Previous and Next stack do pretty much what they say on the tin.

Aperture Tutorial - Stacks
This one is slightly different in that it selects the stack that you move to. The previous option just moves the image browser view to the stack thumbnail location.

Aperture Tutorial - Stacks
This option is what you should use for opening and closing stacks. This a bit like a book or a draw opens the stack out so you can see all of the images. The option at the top of Close Stack changes between close and open depending on what stack you have chosen an weather it is open or not.

Aperture Tutorial - Stacks
Finally as an end note you can quickly customize the tool bar at the top with the stack options.
Right click on the menu and select Customize Toolbar.

Aperture Tutorial - Stacks
You are then presented with all these options to add to the toolbar. Which like any option with in Mac OS X Tiger you can drag and drop the options as you want.

Aperture Tutorial - Stacks
On closer inspection these (the icons in green) refer to the options you what for stacks. All the other options I will go over in due course.

Aperture Tutorial - Stacks
Hopefully this has give you an insight into stacks and how to use them. If you want to see the rest of the tutorial please use the Aperture label.
Aperture Tutorial - Adjusting Photos - Part 7

Hey

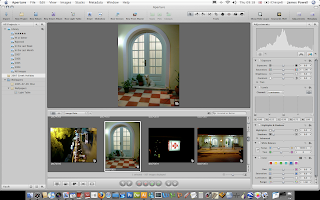
I'm a bit bored with giving you a tutorial on the interface in Aperture, so i'm going to give you a quick tutorial on modifying photos and what happens when stuff changes in the adjustments window. If you need a copy of Aperture please go to the download store to purchase a copy.

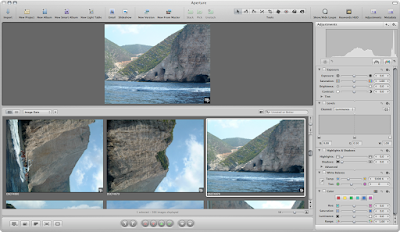
Any way moving on, i've hidden the projects pane from the window menu. I've picked a suitable photograph that could perform some minor changes.

Aperture Tutorial - Adjusting Photos
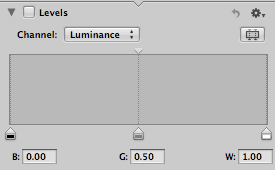
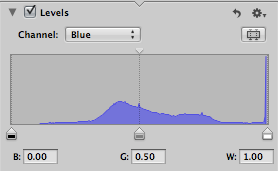
One of the biggest tools for changing photos is levels. This tool changes the levels (well duh) of a photograph, and is good for making a photo look better and fuller colours. One tip is to make sure that your monitor is accurate in its colours. A wonky coloured monitor will not help when adjusting images.

Aperture Tutorial - Adjusting Photos
Once you make any changes or select a check box within Aperture another copy will be made. This is put into a stack (more explained in later tutorials). This will be visible in the image browser.

Aperture Tutorial - Adjusting Photos
If you notice in the top right hand corner a number will be displayed, this is due to the amount of images in a stack. Every change to the master will great a new copy and increase the stack number.

Aperture Tutorial - Adjusting Photos
If you notice you can change the levels and although it makes subtle differences these are visible.

Aperture Tutorial - Adjusting Photos
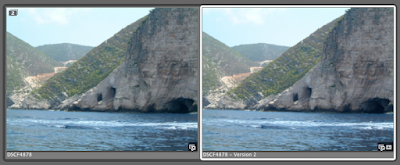
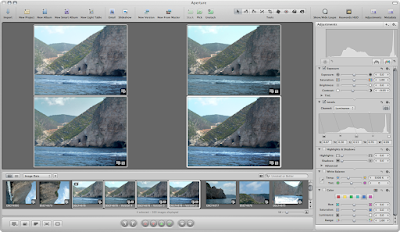
If you use the compare option you can compare the different images in the stack.

Aperture Tutorial - Adjusting Photos
As you can see the more changes you make to the master the more copies in the stack that are created.

Aperture Tutorial - Adjusting Photos
Within the levels (which is one of the best tools) you can change the individual colour properties, the more changes you make the more you can modify the image. All changes are kept (unless you delete the version).

Aperture Tutorial - Adjusting PhotosAgain is you use the compare option, selecting 4 images, you can visibly compare the changes you have made. Click the image for the full size version to sheet what has happened.

Aperture Tutorial - Adjusting Photos
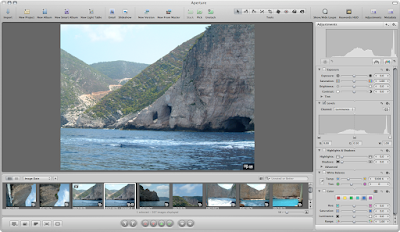
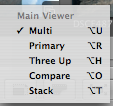
The view options in the bottom left corner in the control bar depicts what options you can see in the viewer.

Aperture Tutorial - Adjusting Photos
As you can see after you have adjusted an image you can promote and image which is picked (more on stacks in the next tutorial)

Aperture Tutorial - Adjusting Photos
If you want to close the stack so you don't have hundreds of the same image visible use the Stacks > Close Stack option.
Aperture Tutorial - Adjusting Photos
The four images have now become one.

Aperture Tutorial - Adjusting Photos
Now I no that this was a bit brief but I will explain all the different options that you can do to an image in later tutorials.