Showing posts with label Icon. Show all posts

Hundreds of Web 2.0 Layers and Gradients

Continuing on the Web 2.0 theme, I have found and complied a large collection of about 200 + web 2.0 gradients and layer styles. These are great if you want a helping hand at creating buttons and layer styles for you website.

You can download the pack here.

For example the image below was a speech bubble shape with a layer style added. An amazing effect done in a couple of seconds.

Hundreds of Web 2.0 Layers and Gradients
As you can see from the preset manager there is a lot of style to chose from to get the best from you creations.

Hundreds of Web 2.0 Layers and Gradients
Hundreds of Web 2.0 Layers and GradientsTo install go Edit > Preset Manager > Gradients or Layer Styles > Import

You can download the pack here.

Creating A Web 2.0 Flag Icon

Web 2.0 Icons are every where. On websites coming into programs. This icons are graphics that have reflective shadows and look really cool. But how do you do them for country Icons. Heres how. Click any of the image to enlarge them.

You will need:

Photoshop or Similar
A Flag photo
Time

1) The first step is to set up your canvas, I chose a nice large size of 500 x 500 to get the best effect . The bigger the better because more detail can be added to the image.

Creating A Web 2.0 Flag Icon2)

The next step is to find a picture of a flag on the internet. I chose, the Union Jack. Paste this into Photoshop.

3)

Centre your flag as necessary. You are trying to capture the centre part of the flag.

Creating A Web 2.0 Flag Icon
4)

Using the centre marquee tool draw a circle around the centre of the flag. Using the shift key to keep the aspect ratio correct. In Photoshop use space to arrange the circle as necessary.

Creating A Web 2.0 Flag Icon
5)

Copy and paste the centre circle onto a new layer. You can get rid of the original flag layer.

Creating A Web 2.0 Flag Icon
6)

The next step is to add the layer effects to the circle layer. This is done in 3 parts. Inner glow, Bevel and Emboss, and finally a Stoke.

Use the inner glow, set the colour to white and size to 20.

Creating A Web 2.0 Flag Icon
7)

With the Bevel, set the size to 200 and if necessary reduce the opacity of the black. You don't want the shadow to be too dark.

Creating A Web 2.0 Flag Icon
8)

This is usually an optional extra but looks good if you do it. Add a stoke to the layer. The main colour of the flag is used.

Creating A Web 2.0 Flag Icon9)

Once this is done, you have to add the main highlights that give the best effect. To do this create two new layers and turn them into a clipping mask. Two layers are used so you can adjust the opacity as needed.

Creating A Web 2.0 Flag Icon
10)

Using the marquee tool again, draw and ellipse at the top of the image. Add a white to invisible layer on to this clipping mask. Adjust the opacity as necessary.

Creating A Web 2.0 Flag Icon
11)

Do the same with the shadow layer. The opacity of this layer usually needs to be vastly reduced to get a good effect.

Creating A Web 2.0 Flag Icon
12)

Grab both layers and rotate them slightly to the left.

Creating A Web 2.0 Flag Icon
13)

This part is used to create the reflective shadow.

Merge all of the current layers and copy it. You should have two layers. If needed remove the white background.

Creating A Web 2.0 Flag Icon
14)

Flip the layer vertically and position underneath.

Creating A Web 2.0 Flag Icon
15)

Create a layer mask, to reveal all. Then add a gradient fill to gently remove the opactiy as shown. This may take a couple of goes to get right.

Creating A Web 2.0 Flag Icon
There you go an Uber looking web 2.0 flag icon.
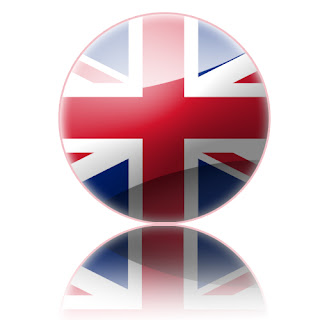
Creating A Web 2.0 Flag Icon
You can of course do this with other flags. And the effects are really cool. Shown below from left to right are: United Kindom, United States of America, South Korea, Earthican flag (Futurama).
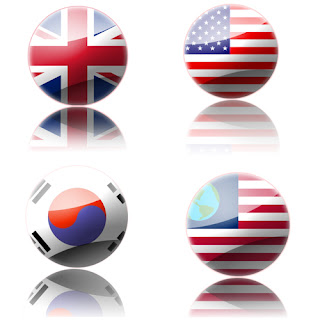
Flag icons

Creating A Cool Web 2.0 Icon

Web 2.0 are those cool icons which you see every where, but do you no how to make them? This tutorial will explain how. Click on any of the images for the full version.

Stuff you will need:

Photoshop (or Similar)

Step 1)

The first step is to create you canvas, this can be any size you want it to be.

Step 2)

Add a shape to your canvas to a new layer and colour it.

Creating A Cool Web 2.0 Icon
Step 3)

Apply Bevel and Emboss to the layer using Size: 200, Highlight white at 100% opacity and a dark blue shadow at 75% opacity.

Creating A Cool Web 2.0 IconStep 4)

Apply a stoke around the shape, in the base colour you picked, size 4.

Creating A Cool Web 2.0 Icon
Step 5)

Apply an inner glow, white, size twenty.

Creating A Cool Web 2.0 Icon
Step 6)

This part becomes a little tricky, you need to create a new layer, right click and create this into a clipping mask. Apple a white to transparent gradient. Adjust the opacity as necessary.

Creating A Cool Web 2.0 Icon
Step 7)

Slightly rotate the layer so its at an angle.

Creating A Cool Web 2.0 Icon
Creating A Cool Web 2.0 IconStep 8)

Again, do this the same for a darker shadow at the bottom, adjust the opacity as necessary.

Creating A Cool Web 2.0 Icon
Step 9)

One of the defining points of web 2.0 icons is the reflective shadow. The method I used is to copy the layer, and remove anything except the white, and reflect it as shown.

Creating A Cool Web 2.0 Icon
Step 10)

Apply a layer mask to reveal all. And then add a black to white gradient, this hides parts of the image, leaving only the shadow.

Creating A Cool Web 2.0 IconStep 11)

As shown you have a cool web 2.0 icon which you can use on your websites.

Creating A Cool Web 2.0 Icon
The cool features of having a simple and effective logo is that you can scale the image to any size.


Creating A Cool Web 2.0 IconKinda cool don't you think. Leave your comments, with your web 2.0 creations.

iCal Replacement Icon Sets

I, as usual, have been searching around the web for icons. See my previous post, for the cool icon sets that a Mac use must have.

This time it is different icon sets for iCal. The icons are different variants of the original layout. Included are blue, green, orange and red. These icons can be used for all types of applications, such as the date in the top left corner (A regular feature from now on) .

Each set contain, one for every day of the year , plus ones that don't exist. (February 31st anyone).


As well as this there is also a blank set, to customize as you need.

You can download the whole pack here.

Included:

Blue, Green, Orange, Red Full set.
Blank Icon of Blue, Light Blue, Green, Light Green, Orange, Pink, Red.

The original creators website is located here.

Edit: These have now been changed.

Must Have Mac Icons

You love your Mac and you want to customize it with out hacking it to pieces, of course the next step is to add some kick ass icons to customize your layout. Present in the list is the must have Macintosh icons to pimp out your desktop. Of course this is not a definitive list and is in no particular order, but are definitively improvements over the native interface.

All of the icon packs can be downloaded in one big pack here.

1) Blend

This is one of a my personal favorites, if you want to more more of a black look out on folders and drives then this is a must have.

2) Application Folders

This icon pack is probably the most used icon pack on my Mac at the moment. It just adds another layer of detail to folders. A must download.

3) Tiger Folders

Although similar in style (Ok, there exactly the same style) these are a bit different and fill in the gaps that the previous collection missed out.

4) External Drives


A very glossy, web 2.0 icon style that looks cool when used for external drives.

5) Hard Drive Icons

This is probably the best Mac icon set for hard drives, there is so much style. A must.

6) African Stamps (Massaimara)

Bored of Mail's Icon, these are a definite replacement, African stamps that improve your dock over and over.

7) Finder

Is your normal Finder getting boring, some of the icons in this set truly make your dock stand out.

Hopefully you will be abble to pimp out your make in style now. Have fun, and leave a comment.

You can download all of the icon sets here.