Hey
I'm afraid that for the next fortnight I'm going on holiday so I won't be able to post till I get back. So in the mean time have fun.
Creating a Dotted Line In Photoshop
Hey There
Creating a dotted line in Photoshop is quite hard, but it can be done, and it is really easy to do. All you will need is Photoshop and 5 minutes. You can click any of the images to see the full size.
Step 1) Open up the brushes and select the advance options pallet.

Step 2) Select brush tip shape and select a small brush. 5 pixels is a good size.
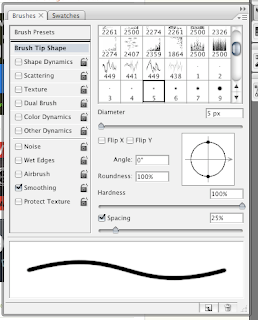
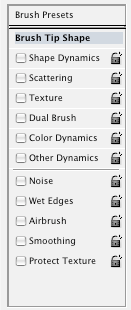
Step 3) Untick everything, smoothing is usually the only one enabled.
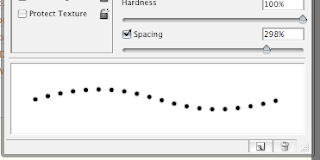
Step 4) But spacing up, the more you space it the bigger the distance between the dots.
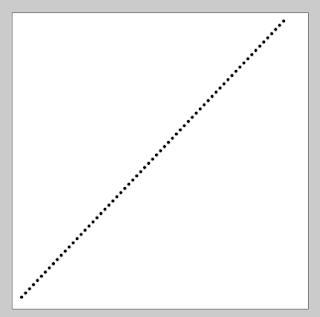
Step 5) Apply to what you want, you now have a dotted line. You can resize it and blur it just like a normal brush.
Creating a dotted line in Photoshop is quite hard, but it can be done, and it is really easy to do. All you will need is Photoshop and 5 minutes. You can click any of the images to see the full size.
Step 1) Open up the brushes and select the advance options pallet.

Step 2) Select brush tip shape and select a small brush. 5 pixels is a good size.

Step 3) Untick everything, smoothing is usually the only one enabled.

Step 4) But spacing up, the more you space it the bigger the distance between the dots.

Step 5) Apply to what you want, you now have a dotted line. You can resize it and blur it just like a normal brush.

Creating an Adobe Application Icon (Photoshop Tutorial)
This tutorial is designed to create an icon that is similar to the Icons you see on all the new applications by Adobe. Although it is no perfect, it still looks good. You will for this Photoshop. Click any of the image for full size.
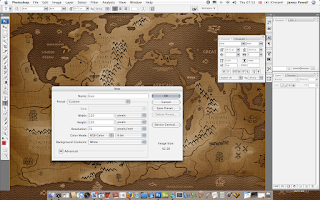
Step 1) The first step is to create your canvas. Use the standard size of 120 x 120 px.
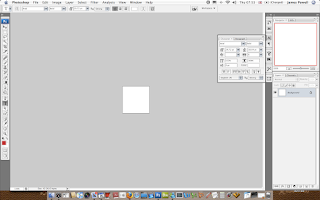
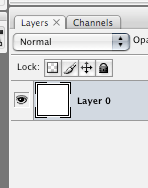
Step 2) Set the layer to a new layer and not the background. This is needed for the effects to be applied.
Step 3) Add your desired colour. I've used a style from a Web 2.0 Styles pack. You will need to do subtle adjustments.
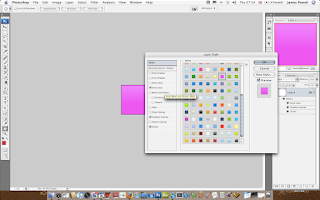
Step 4) Some adjustments that you will need to do is add a bevel and emboss. This needs to be very light and added over the top of the style effect.
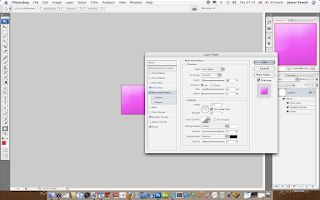
Step 5) You now need to add text. Although there is an official font that is used, I can't find it for free. Although I have used Tahoma. Any sans-serif substitute can suffice.
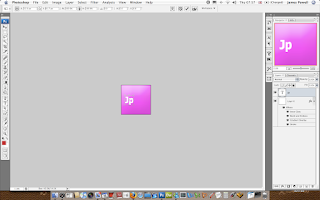
Step 6) Center the text and enlarge to fit. Make sure it isn't to tight around the edges.
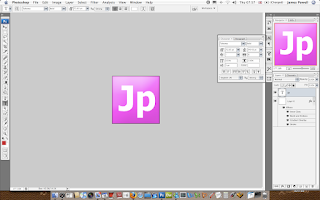
Step 7) At this point you may need to lock the layers so you can transform both layers with out the need to do each layer in turn.
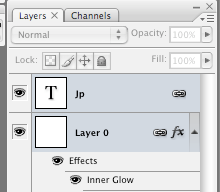
Step 8) Transform the layer so there is a small gap on the bottom and right edge.
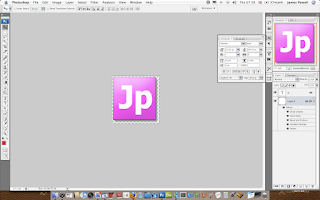
Step 9) One thing that you can do that I forgot is add a very subtle colour overlay to the text. This again is in the style pallet of the Web 2.0 pack.
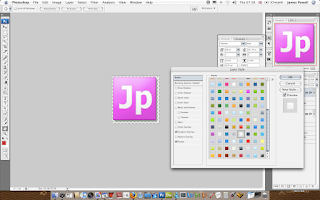
Step 10) Export and you are done. Looks Ok.

Step 1) The first step is to create your canvas. Use the standard size of 120 x 120 px.


Step 2) Set the layer to a new layer and not the background. This is needed for the effects to be applied.

Step 3) Add your desired colour. I've used a style from a Web 2.0 Styles pack. You will need to do subtle adjustments.

Step 4) Some adjustments that you will need to do is add a bevel and emboss. This needs to be very light and added over the top of the style effect.

Step 5) You now need to add text. Although there is an official font that is used, I can't find it for free. Although I have used Tahoma. Any sans-serif substitute can suffice.

Step 6) Center the text and enlarge to fit. Make sure it isn't to tight around the edges.

Step 7) At this point you may need to lock the layers so you can transform both layers with out the need to do each layer in turn.

Step 8) Transform the layer so there is a small gap on the bottom and right edge.

Step 9) One thing that you can do that I forgot is add a very subtle colour overlay to the text. This again is in the style pallet of the Web 2.0 pack.

Step 10) Export and you are done. Looks Ok.
Wallpaper Wednesday - Cartoon Man
Creating A Grunge Photoshop Brush
Hey There
This is a quick tutorial detailing how to create a Grunge Photoshop Brush. Its pretty simple. All you need it Photoshop, some time and a source image to work from. You can use the one provided.
Step 1)
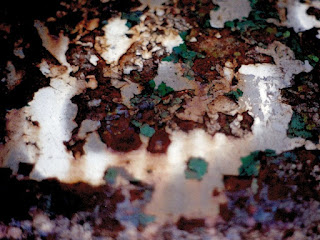
Find an image that you want to turn grungy. It needs to have a lot of texture and interest. Like the one below (Click for full size) I am going to use for this tutorial.
Step 2)
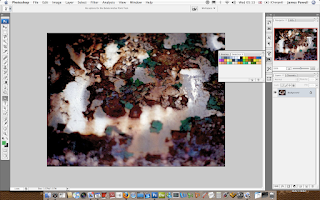
Open in Photoshop
Step 3)
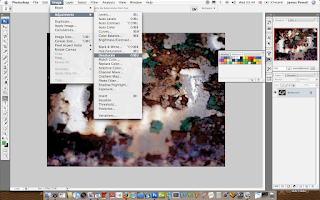
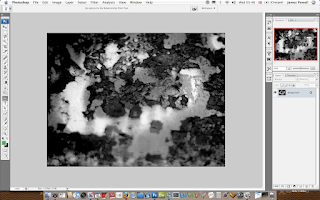
The next step is to desaturate the image. This is done through Image > Adjustment > Desaturate
Step 4)
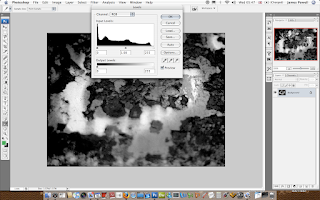
The next step is to remove some of the image though the levels box. Move the sliders towards the middle and adjust accordingly.
Step 5)
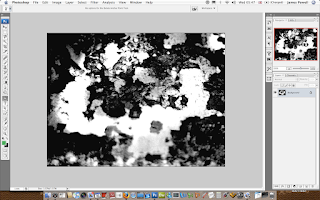
Looks a bit better and has all the elements to great the grunge effect.
Step 6)
Use the lasso tool and create a shape around your selected area. Go Select > Inverse and then press delete. This leaves the bit you have selected with the lasso tool and removed the parts of the image. The background is white because that is the arrangement of my palette (black foreground, white background) change your palette to the default is your image appears anything different.
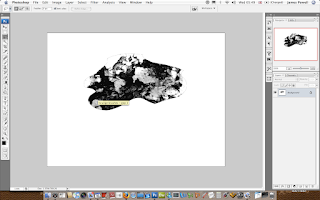
Step 7)
Here i've readjusted the level again. Just to get a good effect of black and white.
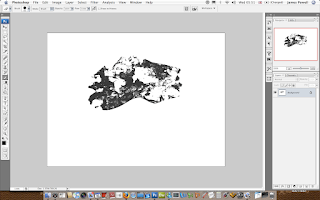
Step 8)
Add a selected box around the outside of your grudge area. This is going to be used for your brush.
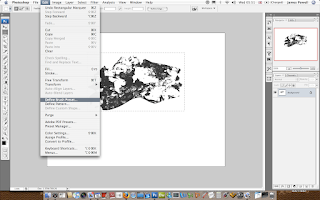 Go Edit > Define Brush Set
Step 9)
Name appropriately.
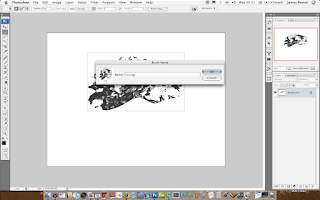
Step 10)
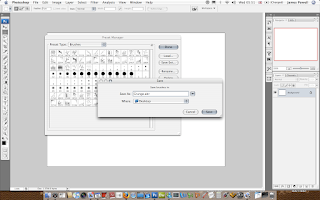
One set up need to do is save the brush out. This is done in the preset manager. If you don't save it out, you can lose it of you reset your brushes.
If you find this difficult I have found a good product on GraphicXtras which you can buy. This brush set of 188 Ink and Distressed brushes is great is you use them for these types of applications. You can find the check out page here. The product page can be found at the bottom if you scroll down.

This is a quick tutorial detailing how to create a Grunge Photoshop Brush. Its pretty simple. All you need it Photoshop, some time and a source image to work from. You can use the one provided.
Step 1)
Find an image that you want to turn grungy. It needs to have a lot of texture and interest. Like the one below (Click for full size) I am going to use for this tutorial.

Step 2)
Open in Photoshop

Step 3)
The next step is to desaturate the image. This is done through Image > Adjustment > Desaturate


Step 4)
The next step is to remove some of the image though the levels box. Move the sliders towards the middle and adjust accordingly.

Step 5)
Looks a bit better and has all the elements to great the grunge effect.

Step 6)
Use the lasso tool and create a shape around your selected area. Go Select > Inverse and then press delete. This leaves the bit you have selected with the lasso tool and removed the parts of the image. The background is white because that is the arrangement of my palette (black foreground, white background) change your palette to the default is your image appears anything different.

Step 7)
Here i've readjusted the level again. Just to get a good effect of black and white.

Step 8)
Add a selected box around the outside of your grudge area. This is going to be used for your brush.
 Go Edit > Define Brush Set
Step 9)
Name appropriately.

Step 10)
One set up need to do is save the brush out. This is done in the preset manager. If you don't save it out, you can lose it of you reset your brushes.

If you find this difficult I have found a good product on GraphicXtras which you can buy. This brush set of 188 Ink and Distressed brushes is great is you use them for these types of applications. You can find the check out page here. The product page can be found at the bottom if you scroll down.
How to download many files at once from Blackboard
If you are using the Firefox browser, there is a solution which will allow you or your students to download all the files in a Blackboard folder at once (without requiring access to the Blackboard Control Panel)
Instructors often post many files in folders in their Blackboard courses. For students, the usual way of downloading these files is by clicking the links one at a time. To speed up this process, there is a plug-in for the Firefox browser called "DownThemAll!" that will go through all the links on a page, let you check the ones you want, and download all of them at once.
This plugin works well with Blackboard.
Using your Firefox browser, get the plug-in here:
-> https://addons.mozilla.org/en-US/firefox/addon/201
Here is a picture of "DownThemAll!" in use:

Note: For the Blackboard site, we recommend setting DownThemAll to download each file sequentially. Do to so, in Firefox, go to Tools > DownThemAll > Preferences and set "Max contemporary downloads" to 1. (Thanks to Colin for this tip)
For more instructions on how to use "DownThemAll!" see the developer's website here:
http://www.downthemall.net/howto/features
Instructors often post many files in folders in their Blackboard courses. For students, the usual way of downloading these files is by clicking the links one at a time. To speed up this process, there is a plug-in for the Firefox browser called "DownThemAll!" that will go through all the links on a page, let you check the ones you want, and download all of them at once.
This plugin works well with Blackboard.
Using your Firefox browser, get the plug-in here:
-> https://addons.mozilla.org/en-US/firefox/addon/201
Here is a picture of "DownThemAll!" in use:
Note: For the Blackboard site, we recommend setting DownThemAll to download each file sequentially. Do to so, in Firefox, go to Tools > DownThemAll > Preferences and set "Max contemporary downloads" to 1. (Thanks to Colin for this tip)
For more instructions on how to use "DownThemAll!" see the developer's website here:
http://www.downthemall.net/howto/features
How to download many files at once from Blackboard
If you are using the Firefox browser, there is a solution which will allow you or your students to download all the files in a Blackboard folder at once (without requiring access to the Blackboard Control Panel)
Instructors often post many files in folders in their Blackboard courses. For students, the usual way of downloading these files is by clicking the links one at a time. To speed up this process, there is a plug-in for the Firefox browser called "DownThemAll!" that will go through all the links on a page, let you check the ones you want, and download all of them at once.
This plugin works well with Blackboard.
Using your Firefox browser, get the plug-in here:
-> https://addons.mozilla.org/en-US/firefox/addon/201
Here is a picture of "DownThemAll!" in use:

Note: For the Blackboard site, we recommend setting DownThemAll to download each file sequentially. Do to so, in Firefox, go to Tools > DownThemAll > Preferences and set "Max contemporary downloads" to 1. (Thanks to Colin for this tip)
For more instructions on how to use "DownThemAll!" see the developer's website here:
http://www.downthemall.net/howto/features
Instructors often post many files in folders in their Blackboard courses. For students, the usual way of downloading these files is by clicking the links one at a time. To speed up this process, there is a plug-in for the Firefox browser called "DownThemAll!" that will go through all the links on a page, let you check the ones you want, and download all of them at once.
This plugin works well with Blackboard.
Using your Firefox browser, get the plug-in here:
-> https://addons.mozilla.org/en-US/firefox/addon/201
Here is a picture of "DownThemAll!" in use:
Note: For the Blackboard site, we recommend setting DownThemAll to download each file sequentially. Do to so, in Firefox, go to Tools > DownThemAll > Preferences and set "Max contemporary downloads" to 1. (Thanks to Colin for this tip)
For more instructions on how to use "DownThemAll!" see the developer's website here:
http://www.downthemall.net/howto/features
A Source of Free Brushes
Hey
I've found a really cool resource on the web which lets you download lots of Photoshop brushes for free. Now these may no be the best in the world but they are very cool if you need a brush style to work with. If you want to find out more go to Brusheezy, and download some now.

I've found a really cool resource on the web which lets you download lots of Photoshop brushes for free. Now these may no be the best in the world but they are very cool if you need a brush style to work with. If you want to find out more go to Brusheezy, and download some now.
Wallpaper Wednesday - Heavy Load
A Video Of A Photoshop Drawing Being Coloured In.
Hey
This may or may not be a regular update, I don't no, but what I have for you is another video of me colouring in the latest cartoon. Again this was done on Photoshop this took slightly longer than the previous video, the original was 45 minutes in length.
If you want you can download the source files to use at your own devices. They are located here.
Video of My Latest Cartoon Being Coloured
 If you take a look over at my main blog you will usually find a couple of cartoons that I irregularly draw, from time to time, my latest one at time of posting is here.
Quite a while ago I did a quick tutorial explaining how to colour one of these cartoons in. This post is conveniently located here.
This time I decided that I should try a go at a bit of video editing and post production to show you how to do a sped up video of me colouring it in. You can find the video below.
Creating a Star Rating System - Photoshop
Hey
This is going to only be a quick tutorial teaching you how to make effective looking stars for use with a star rating system. For this tutorial you will need a couple of things:
Photoshop, or similar,
Web 2.0 Layer and Styles Pack
With any of the image you can click them so they are there full size.
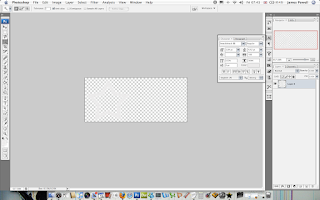
Step 1) Create Your Canvas
The first step is to make a canvas big enough for the size of starts you want to use. The stars shown at the bottom of the page are 30 pixels high. Although I wouldn't make them to big. At this step make the canvas size big enough for 2 stars only.
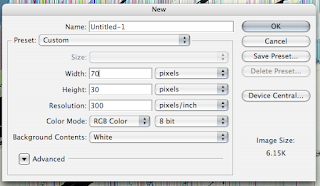
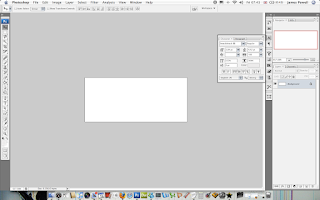
Step 2) The Blank Star
The stars rating system that will be used will have to types of stars. Blank and Coloured. The first step is to create the bank star. Use the outline tool that comes with Photoshop to create a suitable shape. Colour it a nice shade of grey.
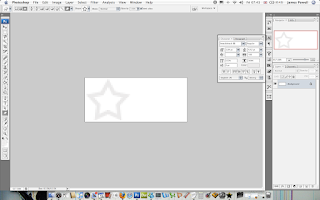
One thing that you will have to do is set the white that was on the previous image to blank. Make sure it is on an individual layer. Use the magic wand to help you achieve this.
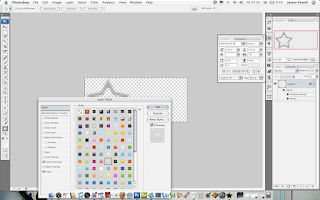
Step 3) Adding Effects
The next step is to add effects to the blank star. Although they are minimal they are noticed. Use the Web 2.0 pack which you can download from above. Add a grey style.
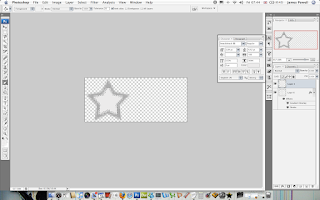
Step 4) Add a Background Colour
The next part is to add a background colour to the blank star. Create a new layer underneath the previous layer and colour it a light grey colour.
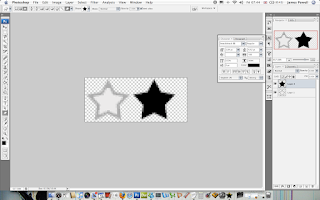
Step 5) The Star
This part of the step is very similar to the previous steps. Again create a coloured star. It really doesn't matter what colour it is at this stage.
Step 6) Adding Effects
Similar to the previous layer effect add a gold coloured layer effect to the star.
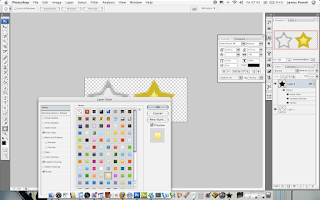
One problem with the layer styles that is included is that the strokes are to big for the size of image we are working on. You may need to reduce this.
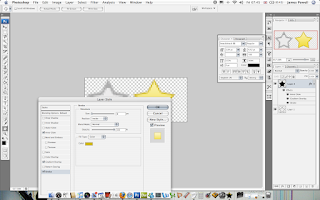
Step 7) Admire
You now have two really cool looking stars which you can put to good use.
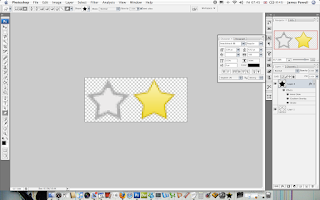
Step 8) Slice and Splice
This is one of the final steps. Slice the image using the slice tool. Export them on the full quality settings. File > Save for Web Devices
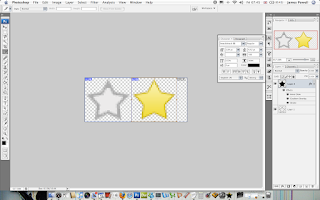
Step 9) Compile
You can now compile the two image into a star rating system. You will have 6 images in total (including blank). Save these as .jpgs. or you can save the ones below.


Not bad for 10 minutes work.
This is going to only be a quick tutorial teaching you how to make effective looking stars for use with a star rating system. For this tutorial you will need a couple of things:
Photoshop, or similar,
Web 2.0 Layer and Styles Pack
With any of the image you can click them so they are there full size.
Step 1) Create Your Canvas
The first step is to make a canvas big enough for the size of starts you want to use. The stars shown at the bottom of the page are 30 pixels high. Although I wouldn't make them to big. At this step make the canvas size big enough for 2 stars only.


Step 2) The Blank Star
The stars rating system that will be used will have to types of stars. Blank and Coloured. The first step is to create the bank star. Use the outline tool that comes with Photoshop to create a suitable shape. Colour it a nice shade of grey.

One thing that you will have to do is set the white that was on the previous image to blank. Make sure it is on an individual layer. Use the magic wand to help you achieve this.

Step 3) Adding Effects
The next step is to add effects to the blank star. Although they are minimal they are noticed. Use the Web 2.0 pack which you can download from above. Add a grey style.

Step 4) Add a Background Colour
The next part is to add a background colour to the blank star. Create a new layer underneath the previous layer and colour it a light grey colour.

Step 5) The Star
This part of the step is very similar to the previous steps. Again create a coloured star. It really doesn't matter what colour it is at this stage.

Step 6) Adding Effects
Similar to the previous layer effect add a gold coloured layer effect to the star.

One problem with the layer styles that is included is that the strokes are to big for the size of image we are working on. You may need to reduce this.

Step 7) Admire
You now have two really cool looking stars which you can put to good use.

Step 8) Slice and Splice
This is one of the final steps. Slice the image using the slice tool. Export them on the full quality settings. File > Save for Web Devices

Step 9) Compile
You can now compile the two image into a star rating system. You will have 6 images in total (including blank). Save these as .jpgs. or you can save the ones below.


Not bad for 10 minutes work.
Subscribe to:
Comments (Atom)

